
How to create a professional email signature in Outlook
In this article
By Svetlana Cheusheva, updated on August 14, 2026
This guide covers everything you need to design and set up a modern email signature in Outlook. You will learn how to create professional signatures directly in Word without using any third-party tools, and how to use customizable templates to quickly build a robust, responsive email signature.
Professional email signature examples #
Before diving into the creation process, let’s define what makes an email signature truly professional. Basically, a professional signature should convey your role clearly and support the way you interact with recipients. There is no universal formula: the right content and design depend on your position, industry, audience, and communication goals.
In 2026, the prevailing trend is toward clean, minimalist, mobile-friendly designs. An effective signature should be concise, easy to scan, and structured with a clear visual hierarchy, allowing recipients to find the most relevant information at a glance.
To see how this works in practice, let’s compare two signatures within the same company and see how their design choices emphasize individual roles and serve different communication purposes.
Example 1: Executive and C-suite signature #
This signature is laconic, restrained, and authoritative, designed for swift high-level corporate communication. It uses a simple, subdued color palette and a clear information hierarchy. This understated, professional style works well for a senior corporate role, where clarity and credibility are more important than visual decoration.

Why it works:
Zero clutter: Executives handle high volumes of correspondence. A clean layout ensures key contact details (phone, email, office address) are readable at a glance without visual distractions.
Professional headshot: Formal attire and neutral background signal corporate stability and leadership.
Single focused action: Instead of a row of social icons, it features a single button linked to LinkedIn. This keeps the focus strictly on B2B networking and professional relationship-building.
Example 2: Creative signature #
The signature is more expressive and visually detailed. It uses stronger colors, social media links, portfolio previews, and a prominent call-to-action button. This approach suits a graphic designer or art director because it highlights personality, creativity, and examples of their work.

Why it works:
Visual proof of capability: A thumbnail gallery at the bottom demonstrates the person’s aesthetic skill before a recipient even clicks a link.
High-impact call to action: The high-contrast dark button gives prospective clients an immediate next step.
Multi-channel reach: Adding social media icons makes sense for a creative director who showcases their work and connects with clients on visual platforms.
Both signatures are effective because each reflects the person’s role, audience, and professional priorities.
Now that you have an idea of what a professional email signature looks like, let’s see how to craft your own step-by-step.
How to make a professional email signature using Word #
Creating a custom email signature in Word is an excellent way to build a reliable layout before bringing it into Outlook or another email program. Instead of Word, you can use any other text editor that supports tables. A table is the best approach because it keeps all the signature elements neatly aligned and prevents them from shifting out of place.
Here are the steps to create a structured email signature in Microsoft Word:
Step 1: Set up the table structure #
To begin, we need a solid framework to hold everything in place.
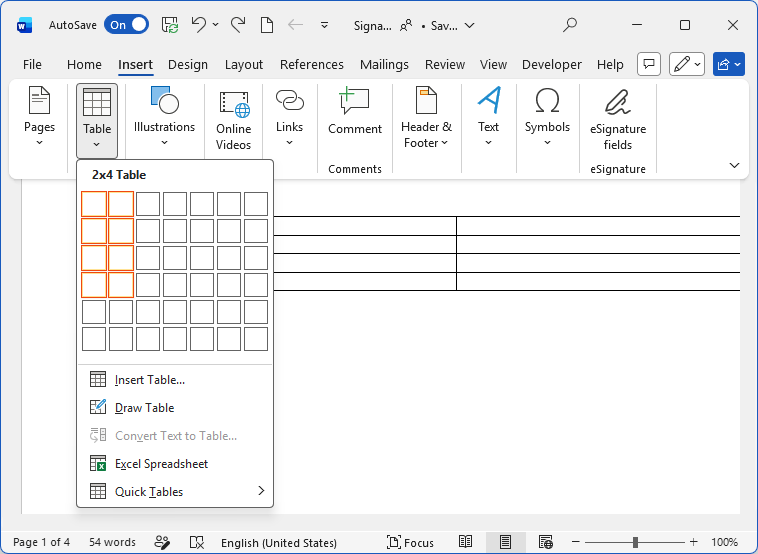
Go to the Insert tab on the ribbon and click Table.
Select a 2x4 grid (2 columns wide, 4 rows tall). This gives us a dedicated row for the person’s name, a row for the job title, a row for contact details, and a row for the company logo and social media icons. Optionally, you can add the 5th row for the bottom portfolio section.
Step 2: Add your profile picture #
Place your headshot in the top left area and adjust it as needed:
Click inside the top-left cell of your new table.
Go to Insert > Pictures and select your image. Alternatively, you can copy it directly from your image viewer and paste into the table.
Once the image appears, resize it as you see fit by dragging the diagonal double-headed arrow in the corner. For more precise sizing, go to the Picture Format tab, and use the Width and Height boxes on the far right (around 1 – 1.2 inches is usually a good size for a signature).
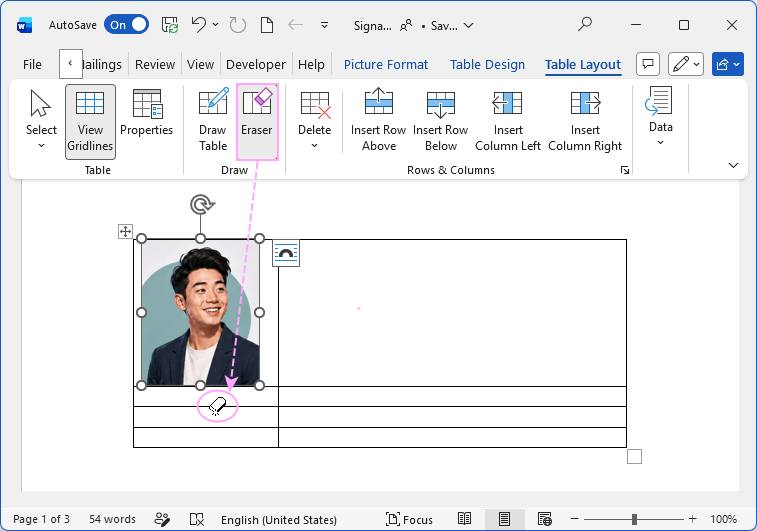
Erase unnecessary row borders below the photo. To do this, go to the Table Layout tab and apply the Eraser tool. Then, use the Alignment options to position your image so it fits nicely.
Step 3: Build the contact information block #
Now, fill in the cells on the right side of the signature with your personal details.
In the top-right cell, type your name, highlight it, and use the Font tools on Home tab to make it bold, increase the font size, and choose a font color that matches your design.
In the cell below, type your job title and the company name separated with a vertical bar (|). Format this line to complement your name (use the same or a similar font color, but a smaller font size).
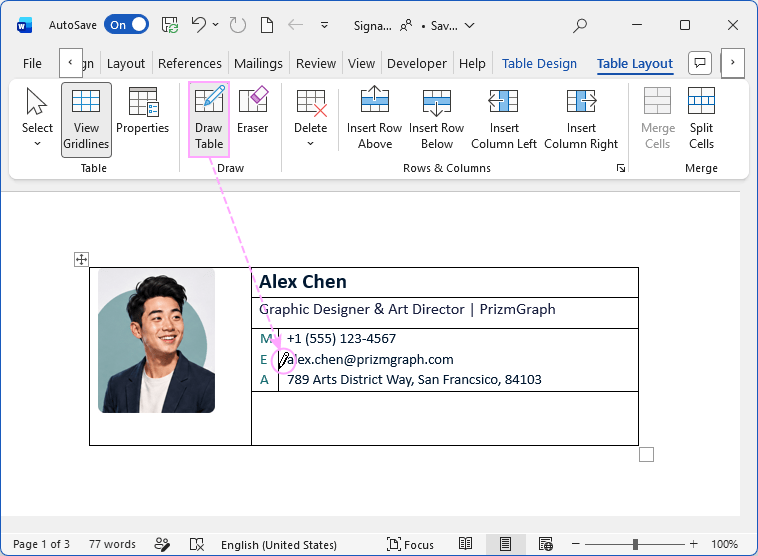
In the next cell, add your contact details. To get a perfect alignment, use the Draw Table tool on the Table Layout tab to draw a vertical divider inside the cell. This creates a narrow column for contact icons or labels and a wider column for the contact info. In the narrow left column, paste the icons (such as a telephone receiver, envelope, and location pin). If you don’t have icons, simply type M, E, and A on separate lines and format them in an accent color.
Step 4: Add the logo and social icons #
In the last row, insert the logo image and social media icons.
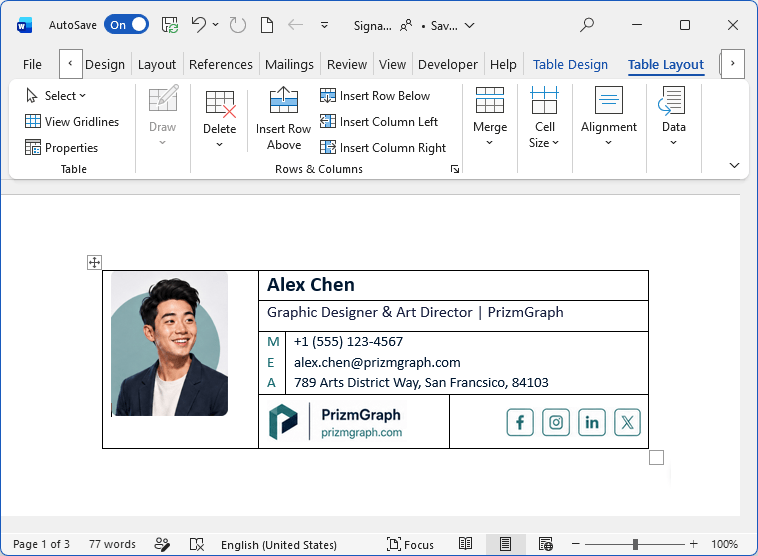
To align them properly, use the same Draw Table trick: place a vertical divider, insert the logo in the left cell and align it left, then place the social media icons in the right cell and align them right.
To make each image clickable, right-click it, select Link, paste the URL into the Address box, and click OK.
Step 5: Add the portfolio gallery and actionable button (optional) #
To create this optional section, extend the signature table and add the visual elements as follows:
Add one more row at the end of your signature table, then use the Draw Table tool to divide it into two sections.
In the bottom-left cell, insert a few small thumbnail images of your work, products, or offers. Place them next to each other and press the Spacebar once between images to add a little spacing. Alternatively, use an image editor to combine the thumbnails into a single gallery, then insert that final image into the cell.
In the bottom-right cell, add a button. For this, go to Insert > Shapes, pick a rounded rectangle, and draw it in the cell. Click the shape and type a short call to action, e.g. View Portfolio or Book a Call. Then, go to the Shape Format tab, choose the desired Shape Fill color, and change the Shape Outline to No Outline.
Convert the shape into an image. Unfortunately, Outlook’s signature editor doesn’t support shapes, so let’s turn the shape into something it does accept: a picture. Right click the button-shape and choose Save as Picture. Then delete the original shape and insert the image you’ve just saved.
To make the thumbnails and button clickable, right-click each element, select Link, enter the relevant URL, and click OK.
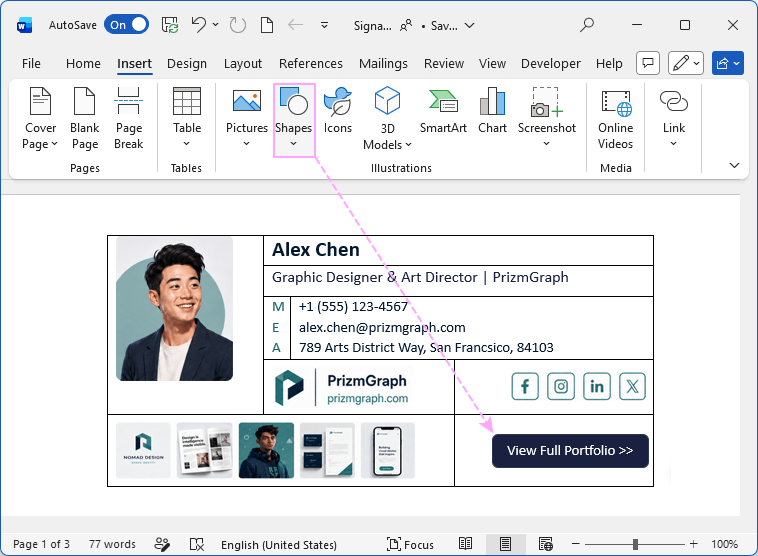
Step 6: Hide the table borders #
At this point, you see the default black grid lines everywhere. Let’s make them invisible, so the table structure doesn’t distract from the design.
Select the whole table.
Go to the Table Design tab and click Borders > No Border.
Step 7: Add dividers #
Finally, let’s draw a couple of lines separating the top and bottom sections:
On the Table Design tab, choose a Pen Color that complements your signature design.
Select a Line Weight to make the dividers thinner or thicker (1½ pt in our example).
Click Border Painter, then click the table borders where you want to add horizontal or vertical dividers.
When you’re finished adding the lines, press Esc to exit the Border Painter tool.
Once the dividers are in place, you’ll be left with a beautifully structured signature!
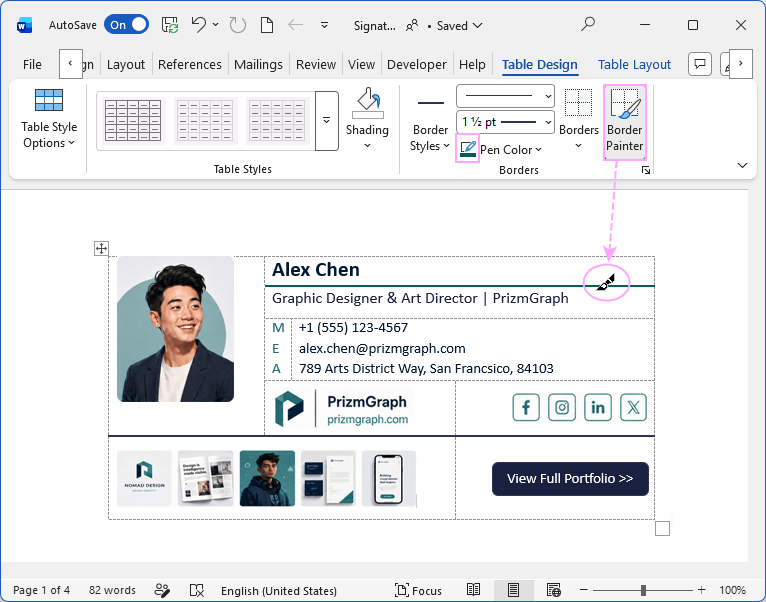
Step 8: Copy the signature to the clipboard #
Now that your signature design is complete, copy it to the clipboard:
Hover over the table and click the four-way arrow icon that appears in the top-left to select it.
Press Ctrl + C or click the Copy button on the Home tab.
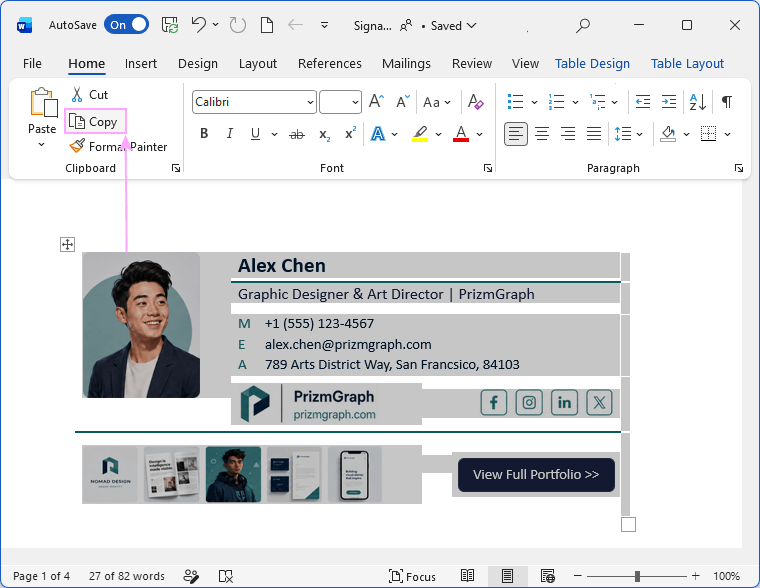
Step 9: Add the signature to Outlook #
The settings vary slightly depending on your Outlook version.
Create a new email signature:
In classic Outlook (365 – 2010): Create a new blank email, and on the Message tab, click Signature > Signatures… > New.
In new Outlook and web: Go to Settings > Accounts > Signatures > Add signature.
In the Edit signature box, paste your copied signature by pressing Ctrl + V, or right-click and choose Paste.
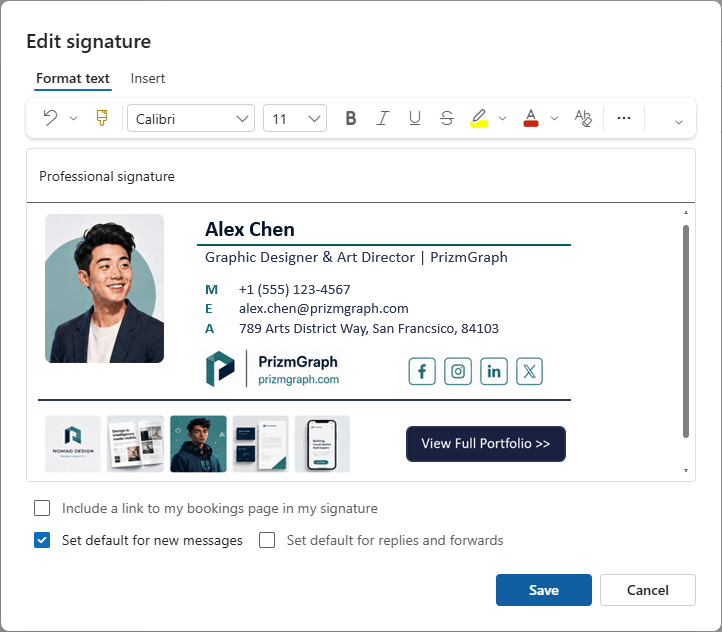
And that’s it! You’ve successfully created a professional Outlook email signature with your photo, company logo, and clickable buttons.
Create a professional Outlook signature from template #
If designing a signature in Word takes too much time or involves too many hurdles, you can follow a simpler and faster way.
Here is how you can create a modern email signature in just a few minutes using Shared Email Signature Templates:
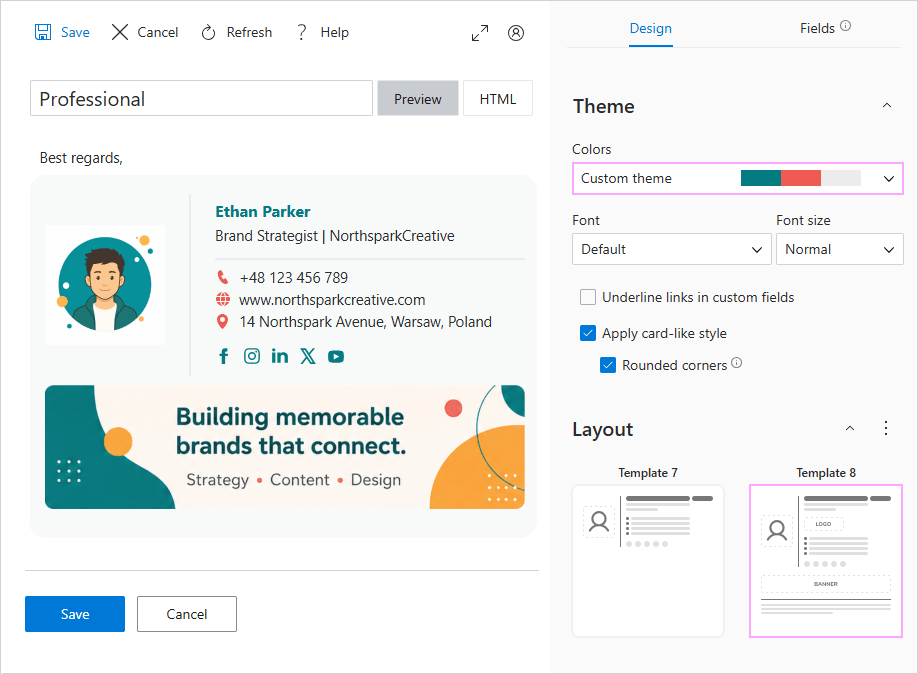
Select a layout. Choose one of the available layouts as a starting point. If you can’t find one that matches your idea of a perfect signature exactly, just pick the closest option. You’ll be able to adjust it later.
Choose a color theme. Pick one of the pre-designed themes, with colors carefully matched for a balanced look. If needed, you can customize it by setting your own colors for individual signature elements.
Enter your details. Add your name, title, contact information, photo, logo, and any other details in the corresponding fields.
Customize it. The visual designer gives you plenty of options. You can add or remove data fields and dividers, rearrange elements within each block, apply a card-like style, and make other adjustments.
Save the signature. Once you are happy with the preview, save your signature.
That’s it! The result is a stunning, responsive signature that looks perfect in any email client and on all devices.
To insert your newly created signature into an Outlook email, just double-click it in the Shared Email Templates pane. You can also set it as your default signature so it’s automatically added to every new message, reply, and forward.
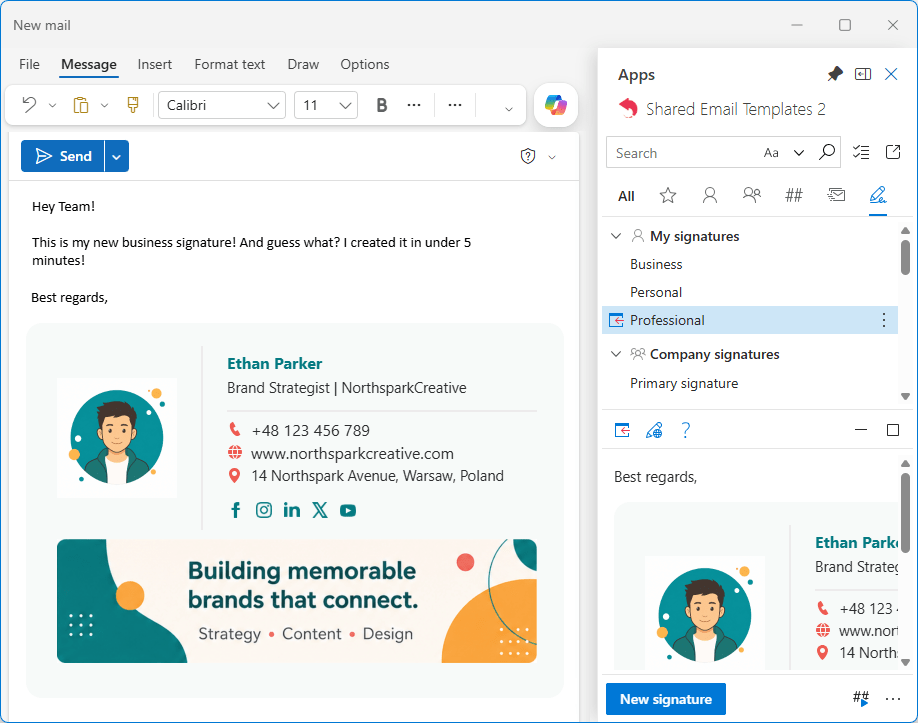
For a more detailed explanation, see Creating an Outlook email signature from template.
What’s next? #
After creating a stylish email signature for yourself, you may want to roll out that beautiful design across your team or entire organization. With the Shared Email Templates add-in, which includes signature templates, that’s easy to do. Instead of setting up a separate signature for every person, you create a team-wide or company-wide signature that automatically pulls each employee’s details while keeping shared information (such as the company name, department, website, etc.) consistent for everyone.
To explore this further, see:
Download the free trial version from Microsoft Marketplace, put your ideas into practice, and build a professional, personalized signature that feels truly your own 😊